
Exploring non-static sprites
- teejaydub
- Sep 27, 2017
- 4 min read

Updated: May 29, 2018

This is a first in a series that explores the educational journey that I take towards making a game. I’ll have different focuses each week, depending on what aspect of game development I’m working on. This first week, I am prototyping ideas and, mainly, practicing art.
Using Pyxel Edit for the past couple months, I’ve been slowly learning how to do pixel art. It’s a big step for me since I’ve never attempted to create art in any professional manner before, so I’m fervently studying techniques (the PixelArt subreddit has been invaluable) and practicing drawing different sorts of things.
Yesterday, I began shading and coloring this rough sketch of a spaceship


As a test, I want to animate this ship rolling around its center axis. This will involve redrawing the ship rotated several degrees. I can’t imagine what the ship will look like at an angle, so I will employ the use of some tools that I’m familiar with to get a better idea. This tool is GIMP, and more specifically, the perspective tool. The perspective tool allows you to, well, change the perspective of the image, as shown in the gif below.
First, though, I have to scale up the original image significantly. This is due to the interpolation effects that occur when the perspective tool is used. If I don’t scale up, this is what the perspective-shifted ship would look like with the original 58x47 pixel image.

While useful, it is tremendously blurry, so I scale up the 58x47 pixel source image up to 580x470 before applying the perspective tool.

Looking at certain details, such as the thruster, we can see that objects on the left half are smaller, and angled towards the center of the ship. Look how the thruster on the left is raised higher than the thruster on the right, but towards the cockpit, the left smaller wing is pointed lower than the right, suggesting that the components are smaller and pointing towards the center of the ship. Now, I can use this image as a reference when redrawing the ship mid-roll.
After tinkering with the image for about 20 something minutes, I get this:


And here it is next to the original:


It looks alright, but the real way to test it would be to stick it in a game. But first I need thrust!
To demonstrate thrust, I will create two sprites for both the “straight” and “angled” ship views. One sprite will be the “half power” thrust and the other sprite will be “full”. First I create two additional layers in PyxelEdit and then draw both sprites on individual layers.

PROGRAMMING IN UNITY
Using Unity, I can quickly make an environment and import all of my new sprites. My goal will be to control the ship using the WASD keys. When “w” is pressed, turn on the thrusters. If “w” and either “a” or “d” is pressed, roll the ship left or right, respectively.
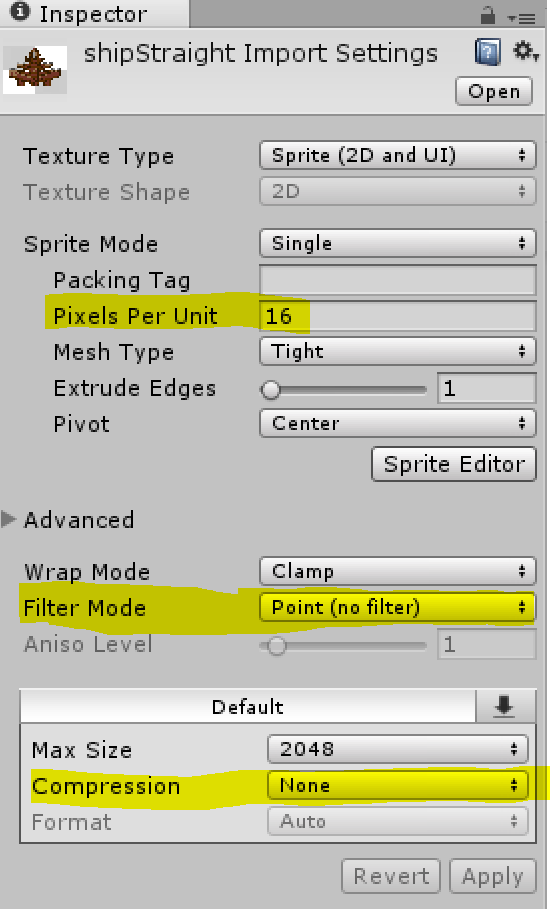
Once in Unity, I configure all of the sprites to make sure the sprite density is 16 pixels per one Unity Unit, and turn off any sprite filtering or compression.
To create the animations for the straight thrusters, I ctrl-select the “half” and “full” thrust sprite from the inspector and drag them into the scene. This automatically combines the images into an animation and a window will pop up asking where to save the animation. After the animation is saved, there will be a GameObject in the scene with a sprite renderer and the animation component already on it! I do the same for the angled thrusters, and then move on to the main script.

After I drag in the default ship sprite into the scene, I add a script component to it and call it “shipScript”. Double clicking on that script opens my IDE and I can begin programming.
I know I will have to be swapping the active sprite between the “straight” and “angled” orientation, so I create two public variables for both sprites, and while I’m there, I also create a variable to hold both thrust animations. After creating the variables, I drag the sprites from the project folder into the respective variables for “straightShip” and “angleShip”, as well as the thrust objects into the appropriate variables in the inspector.

At this point, I select the two game objects containing animations in the scene hierarchy and drag them into the ship object to make them children.

By default, both thrust objects will be off, so I select both and uncheck the box at the top of the inspector to set them inactive.

Now that this has been done, we can write the rest of the code to get this thing working!

This code could be better. Currently, every frame, the ship’s sprite is being updated even if there is no change. This could be remedied through the use of a flag that goes off when there’s a change in direction, but for now, we just want to quickly test how the ship looks. And here it is:

After a few more minutes of tweaking the angled sprite, here’s a bit of an improvement
Here’s a look at the sprite with a slightly different color scheme in a scene with lighting effects.


Cool post—love the pixel art process with Pyxel Edit and GIMP for that rolling ship animation! Importing to Unity and scripting the controls is spot on. As a UK student grinding Unity assignments, programming assignment help UK keeps me from pulling my hair out. Thanks for the inspo!